Ikea Hack Room Divider
20 January 2023

IKEA Hack Room Divider Tutorial! Transform basic Ivar shelf sides into a classy and refined room divider. With easy tips and tricks on wood staining, burlap attachment, and hinge installation.
If you want to watch the entire tutorial, you can do so below!
https://www.youtube.com/@SallySaraClark
WHAT YOU NEED

Ivar Shelving Sides
Measuring Tape
Trim
Clamps
Small Nails
A hammer
Mitre Shears
Staple Gun & Staples
A strong glue
200 grit sandpaper
Pencil
Box cutter/Stanley Knife
Screwdriver
Wood Tint or wax of choice and a lint-free rag
Scissors
Burlap
Iron
Hinges
[If you click on any of the above supplies, you will be taken to the products I used]
METHOD
Step 1:
MEASURING
Start by measuring the door or area that needs to be covered by the divider to ensure that the IKEA shelves with the right height are purchased for this hack.
Step 2:
SANDING & PREPARATION
Once you have all your supplies ready, you want to prepare the frames by removing any stickers and sanding away any blemishes and scratches with a finer grit sandpaper. I used 200 grit. Then, with a damp microfiber cloth, wipe away the remaining dust and debris caused by sanding.


Step 3:
COVERING FRONT HOLES
This step is optional, but you can use some wooden trim to cover the holes. I think it gives the project a cleaner and more refined look. Using mitre shears (or a saw), you can cut the trim to the length of the frame and then use a strong glue, like this liquid nails, to attach the trim. Make sure to use the clamps so that the trim stays in place while the glue dries. Wipe away any excess glue before it dries. To make extra sure the trim stays in place, hammer in some nails along the trim where there aren't any holes.


Step 4:
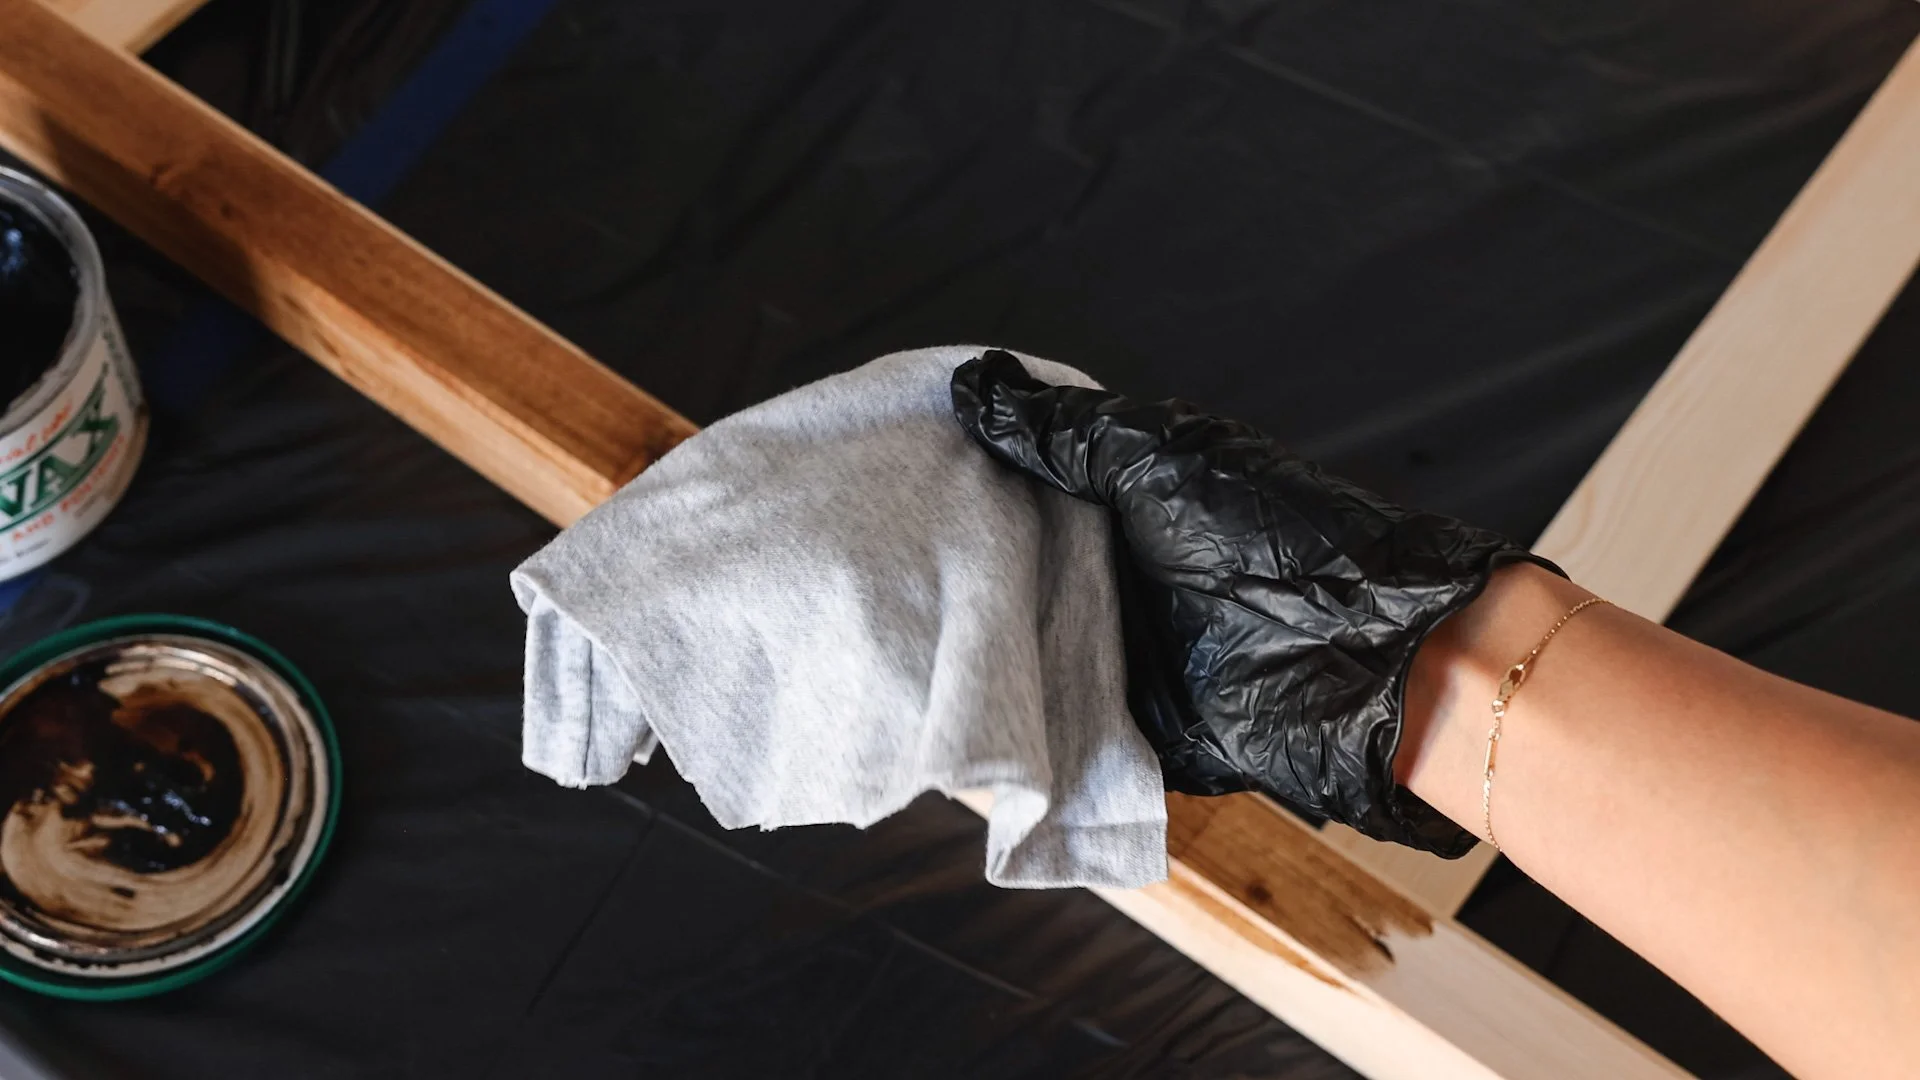
STAINING
I used some garbage bags to protect the table that I was working on. I would suggest staining the wood in a well-ventilated area. Because I don't have access to that, I used a filtered face mask to protect myself from the fumes and gloves to protect my hands from the stain. I love working with Briwax stain because it's just so easy. I apply the stain using an old cotton shirt that I cut up into small squares. One small rag for applying the stain and one clean rag for buffing off the excess stain. But check your stain bottle for all the application and drying instructions.


Step 5:
BURLAP ATTACHMENT
Here I have the trim, for the back of the frame, that I have already cut to size and stained, but I'll keep this aside and tend to the burlap first.
Place the frame on the burlap and roughly cut the burlap, making sure to leave some excess. Once the burlap is cut, use an iron to remove any folds or creases in the fabric. Using a staple gun, you can attach your burlap to the frame. The easy way, as I mentioned earlier, is to attach the burlap to one side of the frame. However, in this tutorial, we are going to do it in the way that covers the holes. Start in one corner of the frame add a staple, lifting the burlap to make sure you don't staple into the holes. Then staple 3 staples into the top of the frame to secure the end. Then work your way down the frame, making sure to check as you go that you staple between the holes.
If a staple doesn't go in all the way and is slightly protruding, you can use the hammer to make sure it has been flattened properly. Once you reach the other end of the frame, trim the excess from the stapled side you have completed. Enough so it's not showing past the frame but also not too close to the staple where then the burlap won't stay in place.
Next, grab your prepared trim and glue it above the stapled burlap to tidy up your work. I found it easier to lean my frame against the wall so then I could easily hammer in the nails along this trim. This time you can't see where the holes in the frame are, so just slowly work your way down hammering in nails every inch or so to ensure you secure this side of the trim as best as possible. Then use a box cutter (also known as a stanley knife) to conceal any excess burlap that may be sticking out. Now that the burlap is secure to the top and to one side of the frame, you can pull it tight enough to then staple it to the other side. Make sure to pull tight but not too tight so that the other side doesn't rip out. Working your way down slowly until you reach the base.
Once you reach the base of the frame, place 3 staples into the end to complete the burlap attachment. Then repeat the trim placement like before with glue and nails.


Step 6:
TRIM
Since this is the back of the divider, you don't need to do this step either, but again, I think it gives the project a more professional look. I used some excess stained trim with some glue to conceal the stapled burlap at the top and bottom of the frame. Using clamps to hold the trim in place while the glue dries. No nails for this part because the wood is too thin. See how much neater it looks.


Step 7:
HINGES
Once you've attached the burlap to the 3 frames, you want to line them up to make sure they are all facing the right direction. Then fold them together as if they had the hinges already on so that you are sure you attach the hinges in the correct sides of the frame.
Lay two frames on their sides and then use painter's tape to hold them close together on the side that you will be installing the hinges. I measured approximately where I wanted the hinges to be and have the details written in a blog post linked in the description box below. Use a pencil to mark the hinge locations and then use a screwdriver to screw them in. The wood is soft, so there is no need to create any holes with a drill first. Just a little muscle with a screwdriver and you are good to go. Stand up the two sides to make sure you've done it right, grab the 3rd frame and follow the same steps again to attach the 3rd frame with hinges. I used a total of 6 hinges.


Step 8:
ENJOY YOUR WORK!


This blog post is not sponsored and all items were purchased by me. Some affiliate links are used, which I earn a small commission, which helps support my work at no cost to you.