Beginner Macrame Plant Hanger Tutorial
31 October 2023

How to make an intermediate macrame plant hanger, tailored for beginners.
This is a step-by-step, easy-to-understand, yet detailed beginner’s guide, with images, on creating an intermediate-level macrame plant hanger.
If you want to watch the entire tutorial, you can do so below!
https://www.youtube.com/@SallySaraClark
WHAT YOU NEED

A Plant (of course!)
Pot (⌀ 24cm and the base is ⌀ 14cm)
Rope (⌀ 5mm, 3 ply cotton cord) *for this tutorial I called the rope cord
[If you click on any of the above supplies, you will be taken to the products I used]
METHOD
Step 1:
UNRAVEL
Step one is to unravel your rope. Cotton cord that comes in a roll can get really tangly and twisty, so you want to make sure its fully unraveled before you start the pot hanger.

Step 2:
MEASUREMENTS
Next you want to measure out the cord for the size of the pot hanger you want to make. These are the measurements for this design…
Pot Size: ⌀ 24cm and the base is ⌀ 14cm
Cord Length before knotting: 1 cord 360cm (folded over = 180cm) x 6 = 2160cm (21.6m)

Step 3:
LOOPING THE CORD
Once the cord is measured, you should pull all 6 cords through the loop until the ends are together, and the center of the cord is folded over evenly through the ring.


Step 4:
WRAP KNOT
Create a wrap knot to securely gather all the cords you've looped. To do this, take an extra piece of cord. Start by forming a small loop with one end and place it on top of the cords you need to gather. Begin wrapping the long end of your cord around the loop and the cords you want to gather. Ensure that you wrap it quite tightly so that it doesn't eventually come loose. Typically, I wrap it around about 5-7 times, depending on how it looks. Take the remaining cord and thread it through the initial loop you made. Pull the cord on the other end to draw the knot into the wrap, making sure to only pull the knot to the middle part of the wrap. It's normal for this to feel tight; that's how you know you've done it correctly, and the wrap knot will be secure. Now, trim each end and use your scissors to conceal the remaining ends. Just like that, you have a wrap knot.


Step 5:
TOP DESIGN KNOB
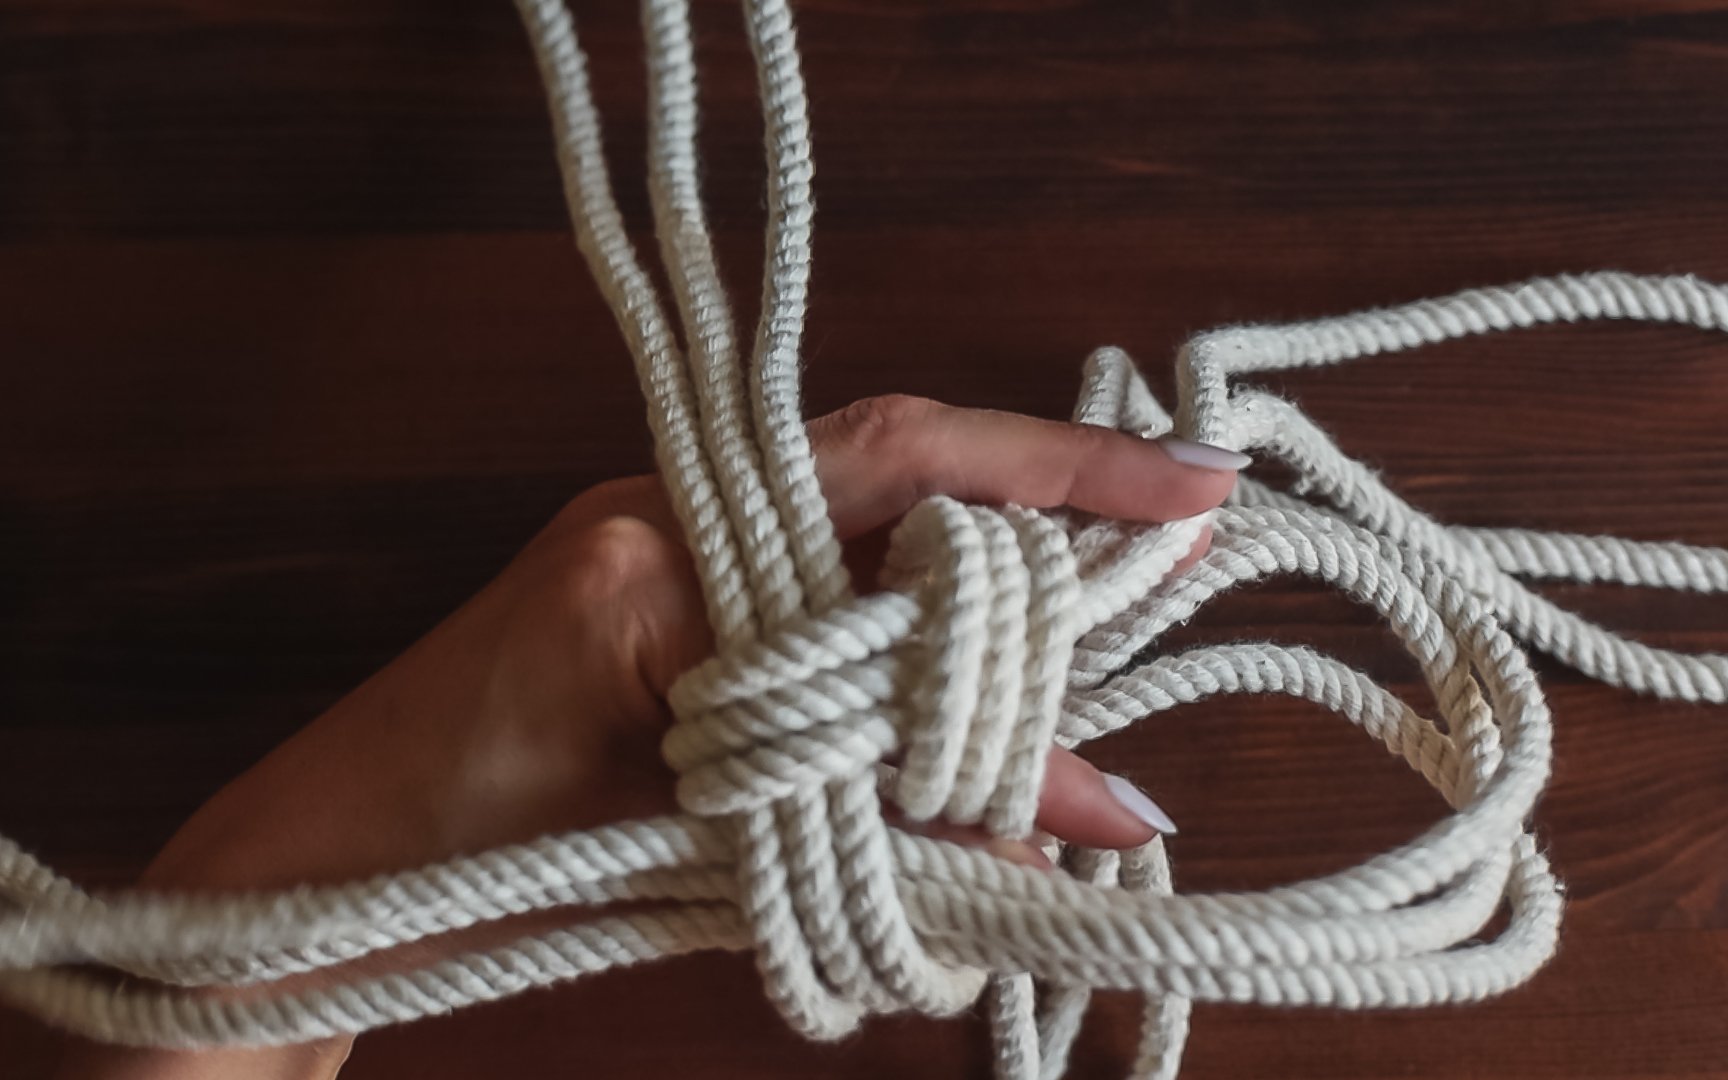
We will create a total of three Chinese Crown Knots to assemble this unique design knob, which I've named the 'Top Design Knob.

You'll want to turn the hanger upside down and separate the cords into four separate arms, with each arm containing three gathered cords. We will begin by going clockwise, placing the first arm over the arm to the left, then take that arm to the left and cross it over two arms. Next, take the following arm, still going clockwise, and cross it over the next two arms to the right. Finally, you'll be left with the fourth and final arm, which you should pull through the initial fold (as shown). Now, you'll want to pull everything through snugly by adjusting the arms to tighten and tidy up your first Chinese Crown Knot.
To create a second Chinese Crown Knot, follow the same steps as the first one but in the opposite direction. So, going counter-clockwise, take one arm and cross it over the right arm, then take the arm to the right and cross it over the next two arms. Continue crossing the third arm over two while still going counter-clockwise until you reach the fourth arm, which should be pulled through the first fold. Again, tighten the second knot to make it look neat.
Now, create a third and final Chinese Crown knot, going in the clockwise direction again.
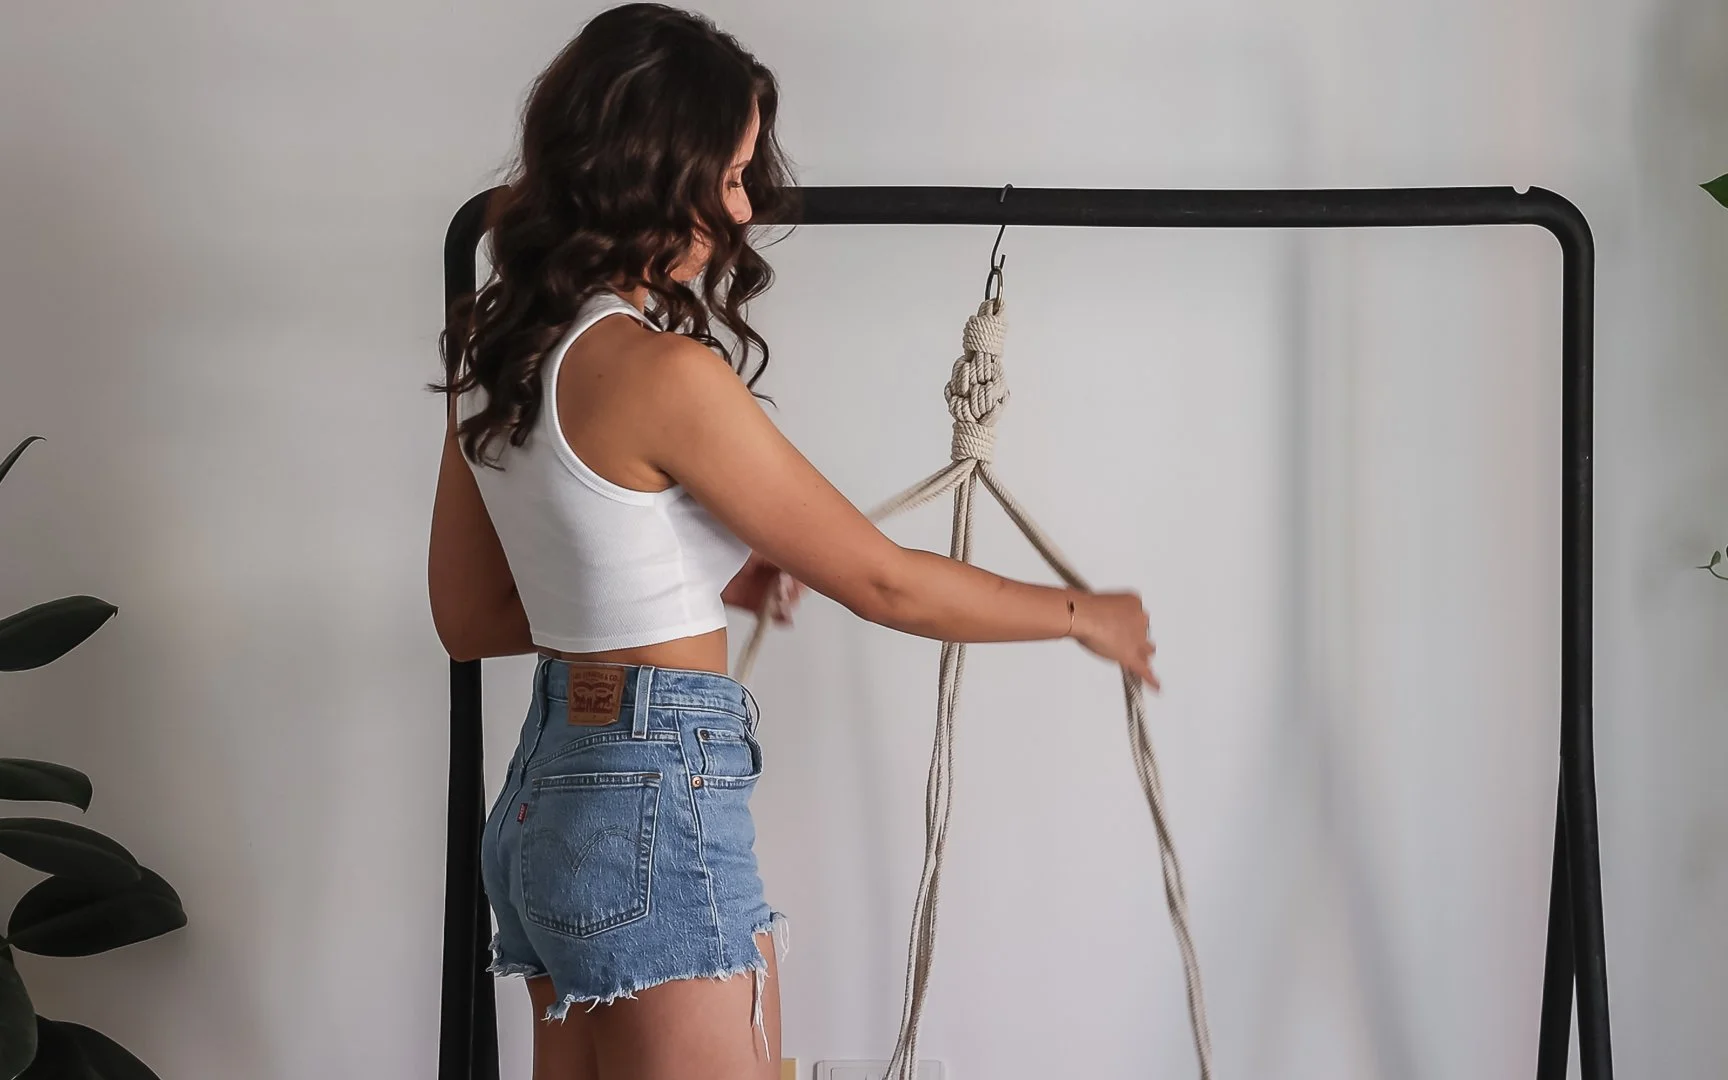
Tip: For the purpose of this tutorial, I've used a sample piece with shorter cords to demonstrate the Chinese Crown knot on a table. However, when creating the actual piece, I recommend sitting in a chair and holding the ring between your legs to allow for more comfortable maneuvering of the longer rope, as shown in the image.


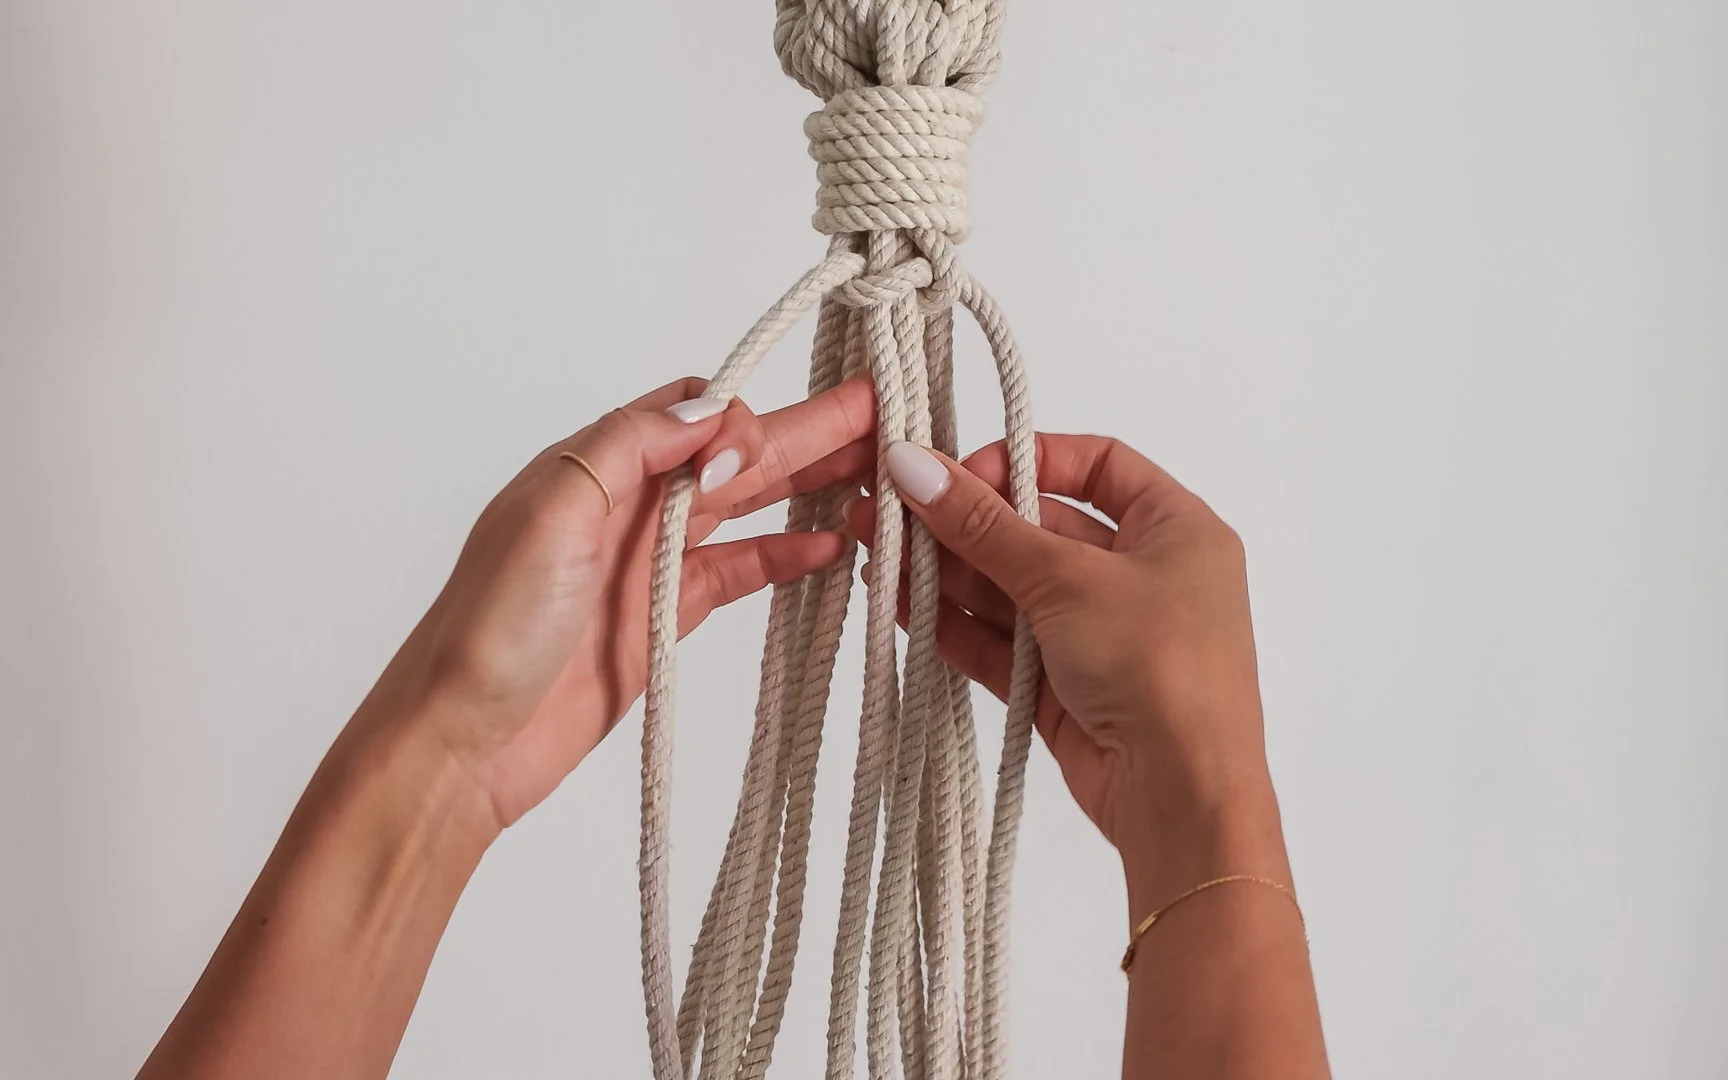
Step 6:
PLANT HANGER ARMS
Put your plant hanger back on the hook and make another wrap knot to complete the top design.

Now, for the macrame plant hanger arms, ensure you separate the arms into three even groups, with each arm having four cords.
Take one arm that consists of four cords that are close to each other and create your first square knot. To make a square knot, keep two cords in the middle, which we'll call the trunk of the arm, and keep one cord on either side of the trunk. Cross the left cord over the trunk, and place the right cord above the tree branch you've just created. Now you have a triangle or what I like to call a Christmas tree. Next, take the right cord, wrap it behind the trunk, and pull it forward through the left side of the tree. Once you've done that, adjust the rope to tighten it in place. To complete the square knot, repeat the process, but this time, take the right branch first, place it over the trunk, and then place the left cord over the branch you've just created. Now, take that left cord (or branch), place it behind the trunk, and pull it through the loop you made with the right cord. Once again, adjust the cords to ensure your first square knot looks neat.
I hope my tree analogy was helpful! Let me explain the square knot one more time with a different perspective just in case. To create another square knot on this plant hanger arm, start from the left and place cord A over the center cords, then place cord B over cord A. Cord B goes behind the center cords and is pulled through the loop on the left to end up over cord A. Adjust the cords so that it sits neatly beneath your first square knot. To complete the second square knot, take cord A, place it back over the center cords, then place cord B over cord A. Cord B goes behind the center cords and is pulled through the loop on the right to sit on top of cord A. Pull and adjust the cords to complete your second square knot.


You'll want to repeat this process four more times to create a total of six square knots. For beginners, it can sometimes be confusing to count the knots, so a helpful way to keep track is by counting the number of loops you've made.

Continuing with the design of this arm, introduce a variation by taking a ruler and measuring approximately 7.5 cm down the arm from the base of the last square knot. Then, create a single square knot. This creates a small change in the design, by only leaving some space in between.
Once more, use the ruler to leave another 7.5 cm gap before making another row of square knots. Now, craft six square knots in a row. This will complete one arm of the plant hanger. So, you'll have a sequence of 6 square knots, followed by a gap, 1 square knot, another gap, and, finally, another sequence of 6 square knots in a row.


Step 7:
PLACING THE POT
(PLANT HANGER NET)
Now make the same pattern on the other two arms.

Once you've finished all three arms for your macrame plant hanger, position the pot you intend to use in the middle of the arms. This will allow you to gauge the length of your crossover, which will help hold the pot in place.

To create the crossover, select two of the arms that are adjacent to each other. Use the right two cords from the left arm and the left two cords from the right arm, then craft a square knot in the approximate location where you measured when the pot was in place.
Now, proceed to create a net-like crossover with each arm, ensuring that the height of the square knots remains consistent. With three arms, this design will feature a total of three square knot crossovers. Once these crossovers are complete, return your pot to the net you've just made to check the positioning.


Step 8:
GATHERING THE BASE
Once you're satisfied with the location of the crossover, gather the knots at the bottom of the pot and assess the appearance. You have the option to add another crossover if desired, or you can continue down the three arms with more square knots. For this design, I chose to continue down the arms with five additional square knots, totaling six square knots.
After completing this, place the pot back into the net hanger and neatly gather all the rope at the base with your hands. While keeping your hand in place, remove the pot and use the thin twine to gather all the cords and hold them together. This helps to keep everything in place while you create your final wrap knot to finish the plant hanger. Snip off the excess string/twine, then place your pot back in the hanger to ensure you're content with how everything looks before proceeding with the tail.


Step 9:
THE TAIL
The most exciting part of making a macrame plant hanger, for me, is cutting the tail. Cut the cord a little longer than you'd like the final tail to be. For this plant hanger, I cut 35cm from the base of the final wrap knot to remove the excess cord. Then, unravel the cord. Once all the cord is unraveled, cut the tail one more time to tidy up the ends, removing about 3cm.


Step 10:
HANGING
Now that your macrame plant hanger is complete, hang it in your chosen location and enjoy your hard work!


Stay tuned for my next post where I share how to make a pulley system for the plant hanger so you can easily bring it down for watering.
This blog post is not sponsored and all items were purchased by me. Some affiliate links are used, which I earn a small commission, whihc helps support my work at no cost to you.